


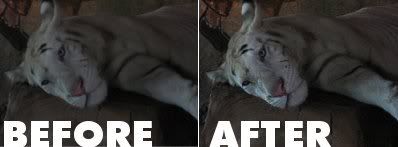
White Tiger photo before and after using Dcam Noise
The BIG problem for photographer is when in the situation that must shoot photo as fast as possible, or when in the situation that there is not enough light or in other condition when they can't takes picture as good as they want.
Photos that shot under bad light condition or shot using high ISO is suffer from noise that spread all over the photo. If we still want to be able to use the photo then we must reduce the noise so we can have clearer photo with lesser noise.
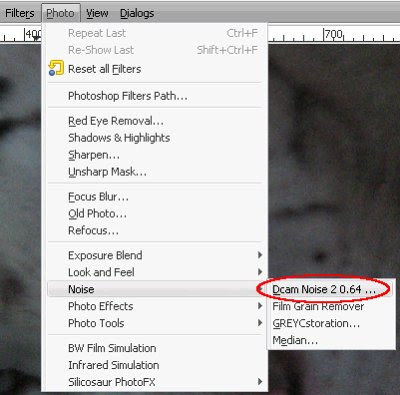
Gimphoto provide many Image Noise Reduction plugin that available under special menu Photo > Noise, such as:
- Dcam Noise
- Film Grain Remover
- GREYCstoration
- Median
For this tutorial, we will use Dcam Noise.
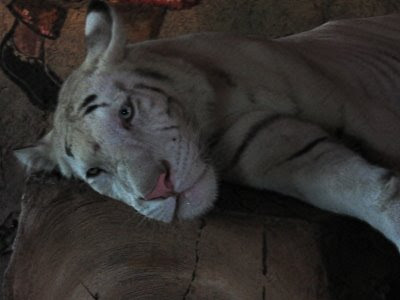
First we need bad noisy photo that we will fix using Dcam Noise, i will use this photo that i taken when i visit Taman Safari, Bali. It is a photo of White Tiger, that tiger is placed in a building that we can go inside and look at it, but the tiger is not in the cage, so we can look at it very closely, but don't worry the tiger is chained and an officer that take care the tiger. The room is have a dim light and there is also sunlight that came through window, but overall the room lighting is bad.
I shot the tiger using only a digital pocket camera Canon A series, the camera zoom is not so far then i must closer to the tiger, so imagine this...in front of you there is really BIG White Tiger without cage at all just only chained in their legs that not really visible to us...and we must move closer to get better photo...oohhh... (>.<) i'm sure mostly is will get our heart pounding very fast...and that will make our camera is shaking...and that is what happened to me...my picture is full with noise because of bad lighting and also got little blur because my hand is shaking when take picture.
Beside photo with bad quality that we must fix, there is also a tiger's fur details that we must maintain when we remove the noise and that will make our tasks more difficult.
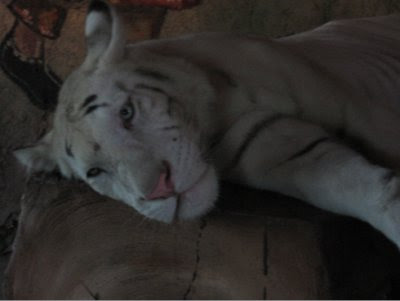
White Tiger at Taman Safari, Bali.
Blur photo with noise all over it.
Tips before we begin, don't edit over original file but copy it to make a backup.
1. Download original white tiger photo from link below:

(click thumbnail to download)
2. Now open the photo using GimPhoto.
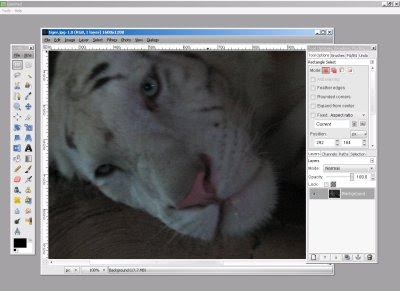
3. Open Menu: Photo > Noise > Dcam Noise.
Dcam Noise Menu Location.
4. Dcam Noise dialog will be open.
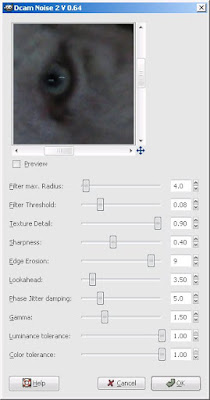
Dcam Noise Dialog
5. Check the preview so we can check noise reduction done by Dcam Noise real-time. And this is a little tips when we doing noise reduction:
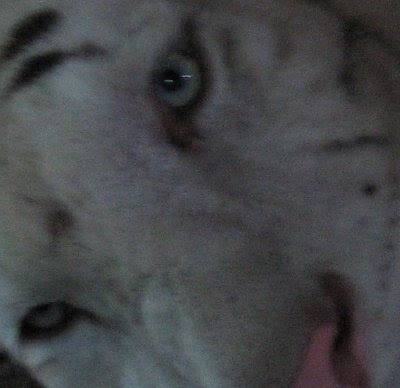
- pay very close attention to the photo area that have many detail on it, in our case is at the area, such as: tiger's eye and fur.
- always compare before noise reduction with after noise reduction with clicking on [ v ] Preview, compare the noise, the detail, the texture color and the roughness.
- everytime we tweak the Dcam Noise parameter with new value, check again the photo detail area and also compare again with original photo.

Use Preview to compare the result.
6. DCam Noise have many parameters to tweak, but don't be afraid, once we know about it then the later is piece a cake :) i will explain it as simple as possible and i will show the most important parameters so we can get great result with lesser parameters tweak (with value that i use to fix this photo).
- Filter max. Radius: define how far the noise reduction effect, bigger is smoother (4.0)
- Filter Threshold: define how far filter affect neighbor area, beware even with small value change, this will give big effect, bigger is smoother (0.08)
- Texture Detail: this is very important, define how much texture detail is preserved, bigger is better (0.90)
- Sharpness: this is very important, define how much sharpness is preserved (this value must be adjust for each image, because different image have different sharpness), bigger is sharper (0.40)
- Edge Erosion: this is very important, define how edge finess (this depend on the pattern of texture from fabric, fur, skin, etc), bigger will give more detail edge ( 9 ).
- Look ahead: this is very important, define to get better texture roughness, bigger will give better texture roughness (3.5)
i don't tweak much of this parameters:
Phase Jitter Dumping: ( 5 )
Gamma: (1.5)
Luminance Tolerance: (1.00)
Color Tolerance: (1.00)
7. And we got this result, compare with original photo, not bad huh? :)
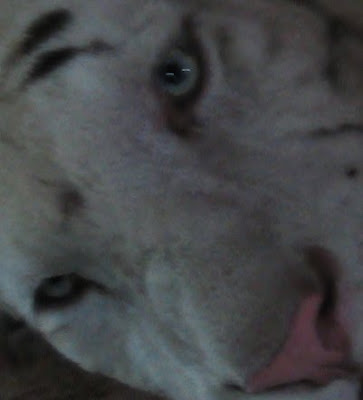
Photo after Image Noise Reduction with Dcam Noise
8. After noise reduction, then we sharpen the photo to bring back focus using Unsharp Mask. Go to Menu > Photo > Unsharp Mask.
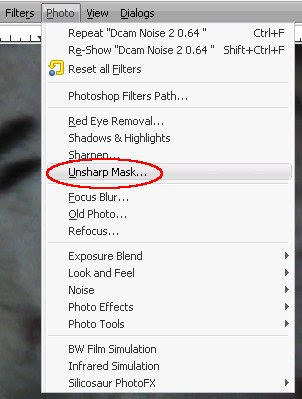
Unsharp Mask Menu Location.
9. Set Unsharp Mask dialog value like in the picture and klik OK.
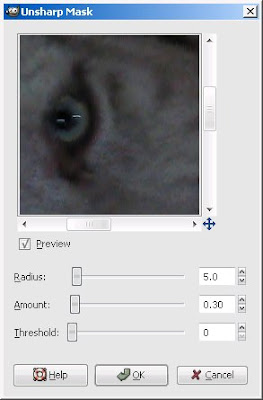
Unsharp Mask Dialog.
10. After sharpen the photo, then we tweak the overall photo look using Curves. Go to Menu > Edit > Colors > Curves..., make S curve like in the picture and then klik OK.
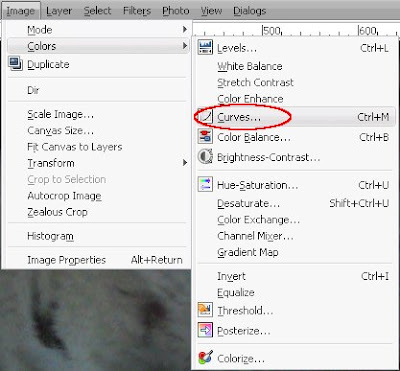
Menu Curves Location.
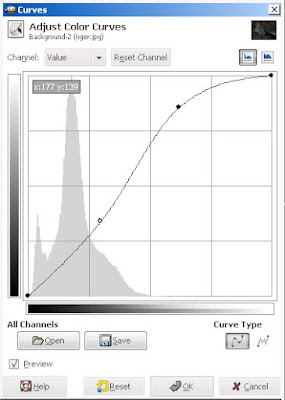
Create Curves like S shape.
11. Compare this before and after image, amazing huh? (^__~)=b
White Tiger at Taman Safari, Bali.
Final Result from Noise Reduction, Unsharp Mask and Curves.
still don't believe the result? then get the original size final photo below.

(click thumbnail to download)
P.S: With this tutorial we can see that actually GIMP plugins is powerful, the result can match with commercial product. But what make the differences? The difference is GIMP plugins is harder to use because we must remember and understand all parameters that listed with technical name, and they didn't provide preset or load and save preset that will much improve user usability and easier to use, that available in commercial product such as Neat Image or Noise Ninja.
Don't forget GIMP users mainly is an artist or a photographer that works on the artistic side and not on the technical side nor have graphics programming background. I hope this will put into consideration by GIMP plugin developers to improve GIMP usability.
Nice discussion...
ReplyDeleteMy only difference is to use GreyCStoration at default as I like how it handles iso noise...and finally using Curve...I would pull the top right point right to about the middle (end of output values) which gives us better color balance...then pull down the lower curve as you did....
Willgoss
You should really get with Tor Lillqvist, the developer of GIMP.
ReplyDeleteHe's left this comment on the Yahoo! gimpwin users group:
"Re: [gimpwin-users] Re: Task Bar real-estate
> Related Question - Would Gimpphoto work on a thumb drive to be used
> on other peoples Windows computers?
Please stop discussing gimpphoto, gimpshop, deweirdifyer, etc or even
cinepaint, on this list. Discuss them on their own lists or forums.
When/if the authors of these tools wish to make their modifications a
part of the official GIMP sources in a clean way they are free to
cooperate.
(I am the creator and moderator of this list, so no "so who do you
think you are" replies please. No "sour grapes" replies please either,
few if any of the GIMP developers care about "market share" as such.
It's fine if somebody makes a modification to GIMP, after all that's
what the license explicitly allows and encourages. But if they
explicitly avoid cooperation source code -wise (like gimpshop and
cinepaint), let them maintain their own support forums and mailing
lists then.)
--tml
Seems that you folks don't get along so well.
A shame, that.
Serr8d,
ReplyDeleteactually, i've been email Mr.Tor when i asked him about compiling GIMP under Windows, he helped me and even he re-released his PSPI (Photoshop Plugin for GIMP) under MIT so i can included with GimPhoto.
but later i email him and he didn't reply, i don't know why.
maybe i should try to contact him again to ask about "how to do clean modification".
thank's for your info. (^__^)m
the harsh part of Tor comment was on Gimpshop and Cinepaint, not on your version
ReplyDeleteAnd the behaviors of the developer of both that forks where quite different from yours
photocomix,
ReplyDeleteglad to hear that :)
i already contact Mr.Tor and he suggest to follow the gimp-dev milist and told me about possibility to make GimPhoto as GIMP official mod, so i subscribe to gimp-dev milist and ask about it but there is one stopper and that is GimPhoto menu that appear like PS :) it's look like many GIMP dev don't like GIMP to look like PS, i think i failed to make GimPhoto as GIMP off.mod, sorry (;_;) hiks...
Great tutorial...
ReplyDelete