


Gimphoto has many noise reduction function, that can be accessed using special menu for photograhy functions, from Image Menu > Photo > Noise
- Dcam Noise
- Film Grain Remover
- Greycstoration
- Median
After try to reduce the noise from White Tiger photo using Dcam Noise, then for this tutorial i will use Greycstoration.
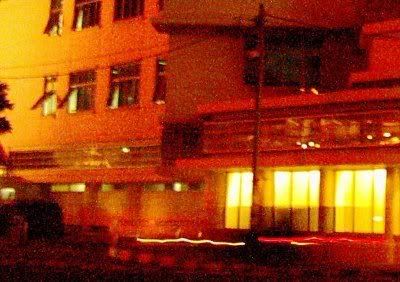
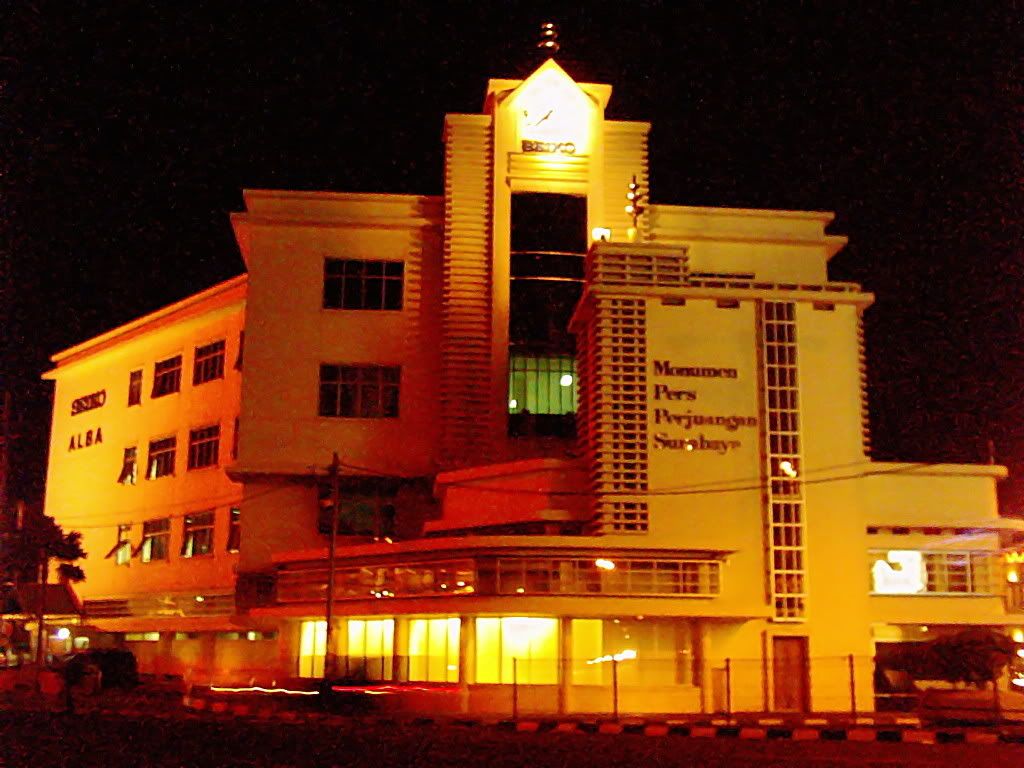
I have a photo about historical building at my town that i shot at night and from far in the middle of busy road then i can't use the flash light. Because the lack of light and using high ISO then the photo result is filled with very bad noise.
If you want to follow this tutorial then download the larger image size by clicking image below:

Historical Building at my home town, Surabaya.
(noise maybe more visible at larger size, click image to download it)
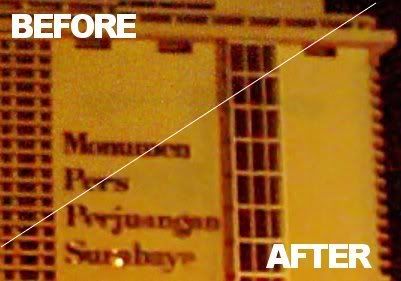
This is many different area in the image with worst noise displayed at 100% view level.
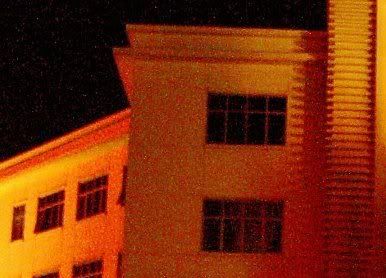
Look at this very bad noise all over the photo
1. Now run Gimphoto and open the photo.
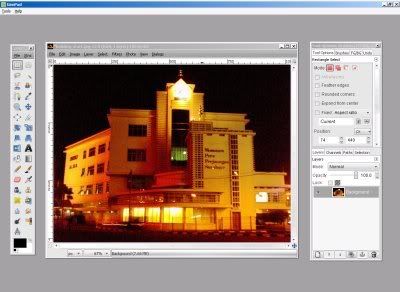
Gimphoto with Gimpad showing historical building photo.
2. Klik Image Menu > Photo > Noise > Greycstoration
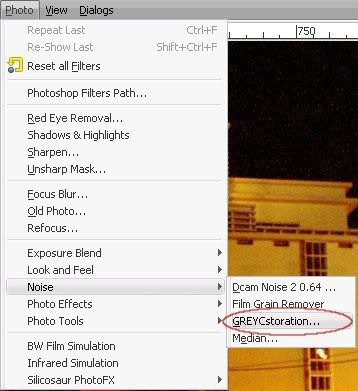
Greycstoration menu location.
3. Greycstoration dialog box will be open with default parameters
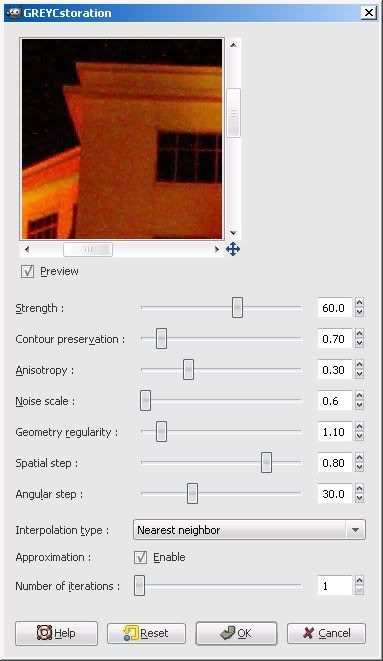
Greycstoration with default values.
Usually Greycstoration default parameters doing just great, parameters that mostly tweaked to improve the noise reduction process is:
Strength, Noise Scale, Interpolation Step and Iteration.
This is simple explanation about each parameters as far as i can understand it:
| Strength | how powerful the noise reduction effect to image, too strong will reduce image detail. |
| Contour Preservation | how strong greyc maintain image contour, lower is blury and higher is noisy. |
| Anisotropy | how greyc performed the smoothing orientation, higher value will cause curly patterns. |
| Noise scale | how strong greyc try to eliminate noise, higher value will give more clean result but more blury image, so balance it between image noise level with image detail level. |
| Geometry regularity | how strong greyc try to maintain image geometry, higher value will cause curly patterns and slightly blur. |
| Spatial step | i how no idea what is this for but higher or lower give small effect to image, just use default value :) |
| Angular step | i how no idea what is this for but higher or lower give small effect to image, smaller value will result much more longer rendering time, just use default value :) |
| Interpolation type | this value is to define what algorithm that greyc use to define what color to replace the noise, using nearest neighbor: fair quality and fastest, linear: good quality and fast, or runge-kutta: best quality and slow. |
| Approximation | mark the check box to speed-up the rendering with acceptable result, but for better result un-mark it but with longer rendering time. |
| Number of iterations | how many time greyc will repeate the noise reduction process so this will need longer rendering time, usually between 1 - 5 times is enough, more higher value will produce "plastic effect" |
4. I will use Greycstoration default values and only change the Noise Scale value to 1.0 for stronger noise reduction effect to the image.

Greycstoration Noise Scale set to 1.0.
5. Put mouse cursor to Greycstoration Preview Area, Click-Drag mouse to the image area with worst noise.
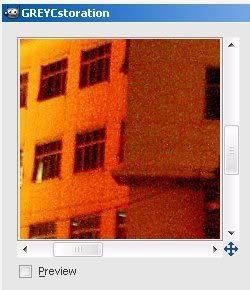
Check image area first without preview.
6. Click [ v ] Preview checkbox to disable and enable Preview, compare the result between before and after noise reduction process.

Later, enable preview to compare the results.
7. Repeat step 5 and 6 for all image area with worst noise or area that need to preserve the image detail, compare the image quality between before and after noise reduction process, search for best balance between image detail and image noise.
8. If you satisfied with the result then Click OK and Greycstoration will process the image.
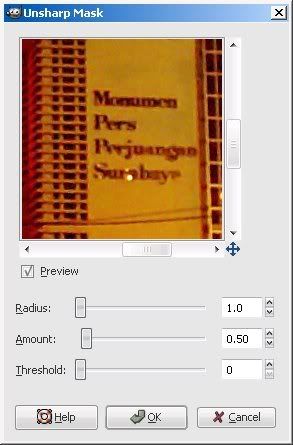
9. The result will be a little blur then do Sharpen or Unsharp Mask to sharpening the image, i use Unsharp Mask with this settings:
Improve image detail with Unsharp Mask.
10. This is my result, click the image to download the larger version of the image.
Click the image to download the final results.
From the result we can see that the Greycstoration produce slightly better image than Dcam Noise but with much longer processing time. But overall Dcam Noise and Greycstoration results as free noise reduction can compete with commercial noise reduction program such as: Neat Image, Noiseware or Noise Ninja.
0 comments:
Post a Comment